Just look at these wonderful colours....... ooooooh so scrummy. The technique I use for laying down the inks is pure Ranger. Mr Holtz has taught this method for some time now and it is real easy but gives great results. Check out his web site, he has some real cool technique-based videos.
 The photograph above will give you a big clue as to where my inspiration came from for forming the Grungeboard flowers. This is a beautiful necklace that my Mum bought me for my birthday earlier this year. I loved it so much and thought it was a work of art in itself. I had been wearing it one day when I found myself in my studio playing with sheets of plain Grungeboard. I took my necklace off and placed it down on the worktop where I was sitting and my eyes kept going back to it glinting in the lights. I love the way the petals curl and it has such wonderful dimension and texture and that was it. I dragged out all my stamps with flowers on them, stamps that I could use for backgrounds and texture and I was off.......
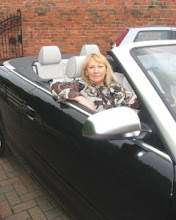
 This was the very first flower I created. Once I had my background worked up I added the flower and finished it with just a touch of Stickles.
  Elusive Images stamps are brilliant for using on your Grungeboard. Try the Big Flowers Themeplate, or the brand new Ruby Tuesday or Diamante Delights Themeplates .
 Here, I've mixed my stamps using some Blonde Moments flowers with Impression Obsession Swirls in the background and a little Hero Arts alphabet for words.
You can see the pattern and texture on the flower petals of the necklace, this gave me the idea to overstamp a layer of the flower.

I used EI's dots and swirls background stamp on the second largest flower which prompted me to use the 'Bandana' technique to pull the whole thing together. I love the 'Bandana' technique (devised by Robin Beam) and added touches to the stamped image on the tag using a Sakura pen.
 Why stop at flowers? Butterfly's don't escape the Grungeboard either and they look great with a little dimension.

 After a little while I spotted my Cuttlebug sitting on the floor and thought I'd try putting the Grungeboard in an embossing folder to see how well it would take, although I haven't included any photo's here I can tell you the results are stunning. Of course, Grungeboard Alphas and Elements do come in a range of textured designs but if you want different patterns... here's your answer.
 On this sample, I put the tag in an embossing folder and ran it through the Cuttlebug and then inked the high spots and edges. This way, you really don't need to do any background stamping as the texture and colour is quite enough. Just add a few embellishments!
 On this tag the background and the top layer of the flower have been spritzed with Glimmer Mists before assembly and you can just see the subtle sheen it gives to the otherwise dull surface of the Grungeboard.
 Here are a few more pics of the culprit responsible for my Grungeboard addiction! This necklace was also the inspiration for a necklace that I made for Glenda's new TV Show: Glimmer with Glenda. I'll include it in my next post.